| | Daniel Maddox - Thread of the Developments! |  |
|
|
| Author | Message |
|---|
dannyboy91
Posts : 30
Join date : 2009-09-30
|  Subject: Daniel Maddox - Thread of the Developments! Tue Mar 23, 2010 4:06 pm Subject: Daniel Maddox - Thread of the Developments! Tue Mar 23, 2010 4:06 pm | |
| | |
|
| | |
dannyboy91
Posts : 30
Join date : 2009-09-30
| | Subject: original sketch Mon Jun 21, 2010 5:14 pm | |
|
Last edited by dannyboy91 on Wed Jun 30, 2010 11:58 am; edited 2 times in total | |
|
| | |
dannyboy91
Posts : 30
Join date : 2009-09-30
| | Subject: Re: Daniel Maddox - Thread of the Developments! Mon Jun 28, 2010 9:33 am | |
| After i had drew a picture of the face of my space pirate. I began to model him out of a cube adding more cuts each time to sculp the face. I found modelling an alien easier than modelling a human because it didn’t have to be as realistic as possible. 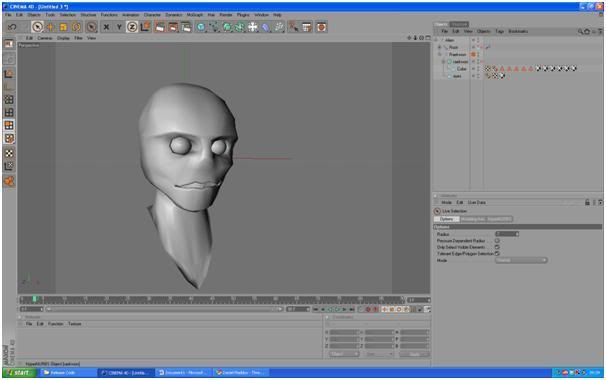 It was important to keep the topology of my model neat and tidy and evenly spaced as it was possible as this would dictate how smooth the skin of my alien was going to be. I then added a hypernurb to my model to make his skin seem smoother. 
Last edited by dannyboy91 on Mon Jun 28, 2010 9:34 am; edited 1 time in total | |
|
| | |
dannyboy91
Posts : 30
Join date : 2009-09-30
| | Subject: Re: Daniel Maddox - Thread of the Developments! Mon Jun 28, 2010 9:34 am | |
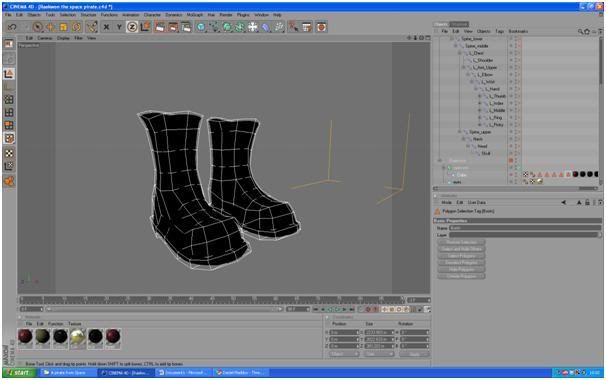
| I began to model the body of my character, I found this a bit tricky because I needed to match the amount of points on the chest so that it would be easily attached to the head.  | |
|
| | |
dannyboy91
Posts : 30
Join date : 2009-09-30
| | Subject: Re: Daniel Maddox - Thread of the Developments! Mon Jun 28, 2010 9:34 am | |
| I had to do the same with the arm and hand, match the amount of points so they joined up easily. I made the fingers with 3 main polygons each so that the bones of the finger could be easily boned and then eventually weighted.  | |
|
| | |
dannyboy91
Posts : 30
Join date : 2009-09-30
| |
| | |
dannyboy91
Posts : 30
Join date : 2009-09-30
| | Subject: Re: Daniel Maddox - Thread of the Developments! Mon Jun 28, 2010 9:37 am | |
|  The screenshot above shows how I textured my 3d model. It involved me going to the UV editing window on cinema 4d. Once there I highlighted all of the polygons that I wanted to texture. After that I made the program show me the UV’s like a flat image like on the right hand side of the screen. Then I created a checkerboard texture and applied it to the characters face. I used a checkerboard texture so that I could then move the points of the UV’s around to make the squares of my checkerboard as even as possible so that when I began to paint a skin texture none of the image would look out of place or blurred. After I had the UV’s where I wanted them I outlined them which created an image I could paint digitally in Photoshop and then import back into cinema 4d. | |
|
| | |
dannyboy91
Posts : 30
Join date : 2009-09-30
| | Subject: Re: Daniel Maddox - Thread of the Developments! Mon Jun 28, 2010 9:38 am | |
| After I completed texturing the mode I began to add bones to it for when I eventually start to animate it. I had for main set of bones. The first set of bones was for the control of the pelvis up to the spine and then eventually the head and neck. The second was for the control of the upper leg down to the toes of the character. The Third was for control of the arm down to the wrist and final set of bones was for control of the hand and the fingers. When I placed the bones in my character I had to make sure that all the bones were being placed strategically so that they would eventually rotate in the right axis. 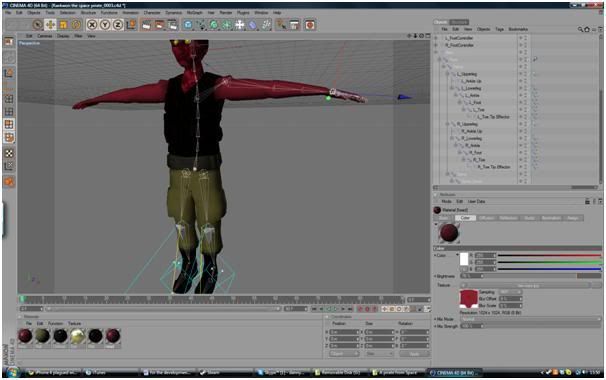 | |
|
| | |
dannyboy91
Posts : 30
Join date : 2009-09-30
| | Subject: Re: Daniel Maddox - Thread of the Developments! Mon Jun 28, 2010 9:38 am | |
| 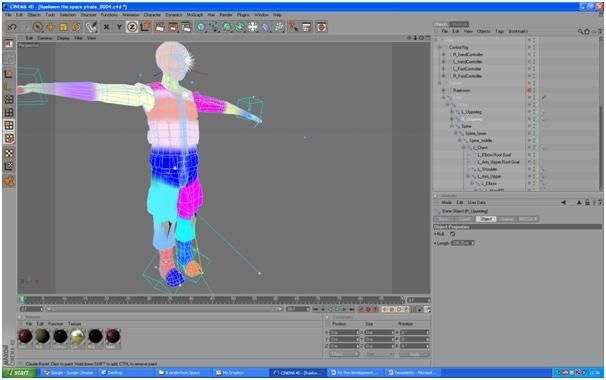 After I had finished placing the bones in my character I began the painfully slow process of weighting my character. Weighting is the process of dictating how the mesh of the character reacts when the bones are moved. So the first thing I did was set the weighting of each of the characters bones to 0 using the claude bonet tool. Then I weighted all of the characters bones to the result of the image above. After doing this I tested each of the bones by holding down 6 and rotating them, if there were any abnormalities there would be a deformation in the mesh which I could then fix. | |
|
| | |
dannyboy91
Posts : 30
Join date : 2009-09-30
| | Subject: Re: Daniel Maddox - Thread of the Developments! Mon Jun 28, 2010 9:39 am | |
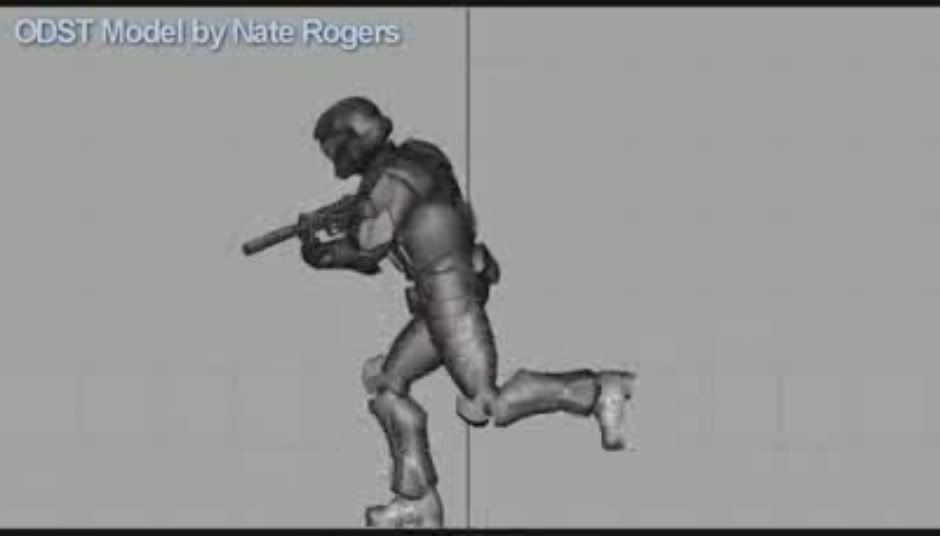
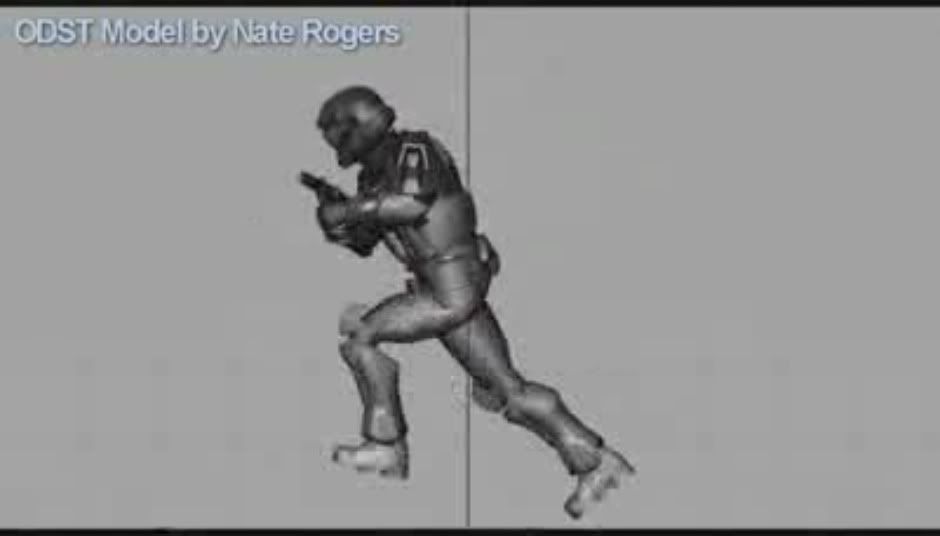
|  I added controls to the character so the movements of the character where smoother. 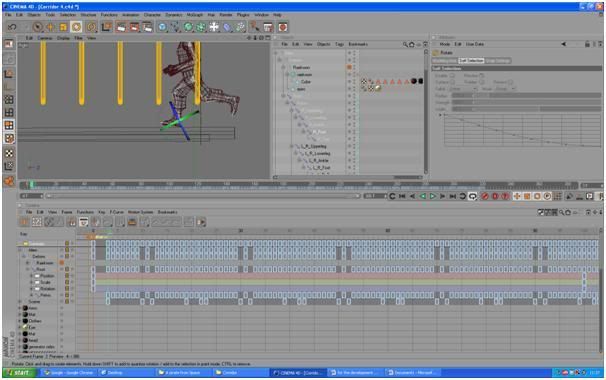 I then created a running animation by rotating the bones and key framing the character, i then repeated the animation in the animation windows. I moved the root bone and then key framed it so the movement speed of the legs would match the distance the character was running. | |
|
| | |
Sponsored content
| | Subject: Re: Daniel Maddox - Thread of the Developments! | |
| |
|
| | |
| | Daniel Maddox - Thread of the Developments! | |
|

 #
#